Roles & Programmatic Access
Set up RBAC roles and create API credentials.
Role-Based Access Control (RBAC)
The Atlar API and Dashboard use RBAC to define user permissions. Each user is assigned one or more roles that control which resources they can read or modify. Attempting to access a resource without the proper role results in a 403 Forbidden response.
1. Create a Role
Navigate to User Management > Roles in the Dashboard and create a new role. For this getting-started guide, grant full access to:
Switch to Advanced setup
When editing a role, click “Switch to Advanced setup” at the top of the role editor. Some of the roles listed below are only visible in Advanced mode.
- ✓ Account Balances
- ✓ Accounts
- ✓ Counterparties
- ✓ Credit Transfers
- ✓ Direct Debits
- ✓ Entities
- ✓ External Accounts
- ✓ Mandates
- ✓ Testbank Transactions
- ✓ Transactions
- ✓ Webhooks
Dashboard: Roles
Create and manage roles under User Management > Roles. Each role specifies the scope of features and functionality a user can access.
2. Create a Programmatic Access user
With your role created, go to User Management > Users and create a new Programmatic Access user. Assign the role you just created.
Upon creation, Atlar displays your ACCESS_KEY and SECRET. The secret is shown only once — store it immediately in a secure location. If lost, delete the user and create a new one.
Dashboard: Users
Create programmatic access users under Settings > Users. These generate the API key pair used for authentication.
3. Connect credentials to this guide
Enter your sandbox credentials below to run API examples directly from this page. Credentials are stored in sessionStorage — they never leave your browser tab, are not persisted to disk, and are cleared when you close the tab.
Connect your sandbox credentials
Credentials are stored in sessionStorage — they never leave your browser, are not persisted to disk, and are cleared when you close this tab.
Credential safety
Only use sandbox credentials here — never production secrets. For your own projects, store credentials in environment variables and add .env files to .gitignore.
Using python-dotenv in your own code
The Python examples in this guide use python-dotenv to load credentials from an AtlarCreds.env file. Install it with pip install python-dotenv.
Try it: simulate a Testbank transaction
Now that you have API credentials, you can create synthetic transactions on Testbank accounts via the API. These appear in Atlar after the next sync (either the hourly cron job or clicking Refresh in the Dashboard). Use negative amounts for expenses.
curl -X POST 'https://api.atlar.com/v1/testbank/transactions' \
  -u '<YOUR_ACCESS_KEY>:<YOUR_SECRET>' \
  -H 'X-Testbank-Authorization: Basic dXNlcjM6cGFzczM=' \
  -H 'Content-Type: application/json' \
  -d '{
    "accountId": "{{accountId}}",
    "date": "2026-03-26",
    "valueDate": "2026-03-26",
    "amount": {
      "currency": "EUR",
      "value": 1500
    },
    "remittanceInformation": {
      "type": "UNSTRUCTURED",
      "value": "Test deposit of EUR 15"
    }
}'Refreshing data
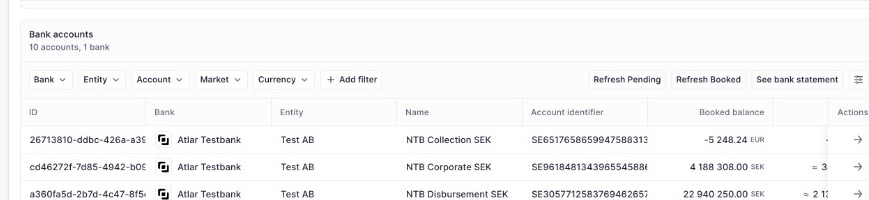
After creating a Testbank transaction, open your account in the Dashboard and click Refresh Pending or Refresh Booked to pull the latest data from the Testbank. The transaction will then appear in your account's transaction list.
Dashboard: Bank accounts — look for the Refresh Pending and Refresh Booked buttons in the top-right of the table